Installation Instructions
Regular Roll Spring Roller
1. Start with a 7/64th drill bit. If it is too difficult to turn the screw, go to a 1/8th inch drill bit.
2. Place your brackets low enough from the top of the frame in order to drop your shade into the bracket. Allow about 1/4 inch clearance from the back of a rolled up shade from the window sash.
3. Each bracket has a hole and a slot. Mount the 1st screw into the slot of each bracket, and hand tighten it. One screw per bracket to start with.
4. Pull the shade about 3/4 of the way down your window. If your shade is hanging to the right for example, raise your shade and remove it from the brackets. loosen the one screw that is in the bracket, and lower the right bracket, and raise the left bracket. Hand tighten the screws again. Put the shade back in the brackets and be sure the material is not telescoping on the roller. Pull the shade 3/4 down the window again and see if this helped. This might take a few times. Once the sides of the shade are hanging straight in the window, roll up the shade and remove it. Then install the 2nd screw.
Adjusting Tension in Spring Rollers
1. To tighten (add tension) to a roller. Pull the shade about 1/2 way down the window. Remove the shade from the window. Roll it up about 12 inches by hand, and put the shade back in the window. Pull the shade down and test the tension. If you need to add more tension, repeat the process.
2. To loosen (decrease tension) to a roller. Pull the shade about 1/2 way down the window. Remove the shade from the window. Un Roll it about 12 inches by hand, and put the shade back in the window. Pull the shade down and test the tension. If you need less tension, repeat the process.
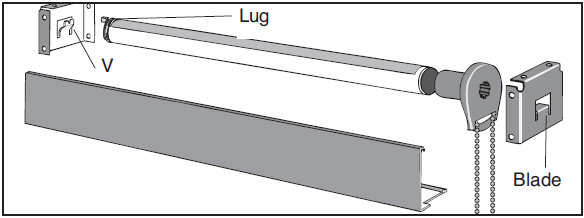
Cord Operated Clutch Rollers
1. Adjust the clutch brackets in the same way as you would a spring roller bracket.
2. Plastic cord stops will allow you to stop the shade in the desired upper position, and lower position. 2 stops per shade. Exra cord is supplied so you can cut off the excess.
Facia Installation Instructions
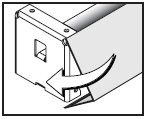
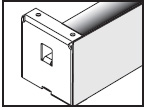
Step 1: Mount the installation brackets with the open end facing downward.
Step 2: Install the shade in the brackets and adjust in the same way as you would a spring roller shade.
Step 3: The bottom of the clutch should always point straight down.
Step 4: Clip the facia on as shown in the illustrations.